This article decribes all steps to configure SSL on Weblogic Server.
For a Weblogic Cluster, these steps must be configured for each cluster member.
To configure java stores (keystore for storing certificate, truststore for Certification Authorities), follow these steps :
Connect to Weblogic Admin Console (click Lock & Edit in production mode) :
-
Go to “Environment / Servers / <ServerName> »
-
Go to “Configuration / Keystore” tab.
-
click on “Change” button.
-
Select “Custom Identity and Custom Trust” in "keystore" list, then click on “Save”
Note : If certificates are provided by a well-known CA, use « Custom Identity and Java Standard Trust ».
-
Make the following changes :
o
Custom
Identity Store : « /u01/app/security/mykeystore.jks” (store previously created)
o
Custom
Identity Keystore Type : « JKS »
o
Custom
Identity Keystore Passphrase : <password for the keystore> (password used during java keystore creation)
o
Confirm
Custom Identity Keystore Passphrase : <password for the keystore>
o
Custom Trust Keystore Passphrase : <password for the truststore> (password used during java truststore creation)
-
Confirm
Java Standard Trust Keystore Passphrase : <password for the truststore>
-
Click on “Save”
-
Click on « Activate changes ».
To configure SSL using keysotres previously installed :
-
Go to « Environment / Servers / <ServerName> »
-
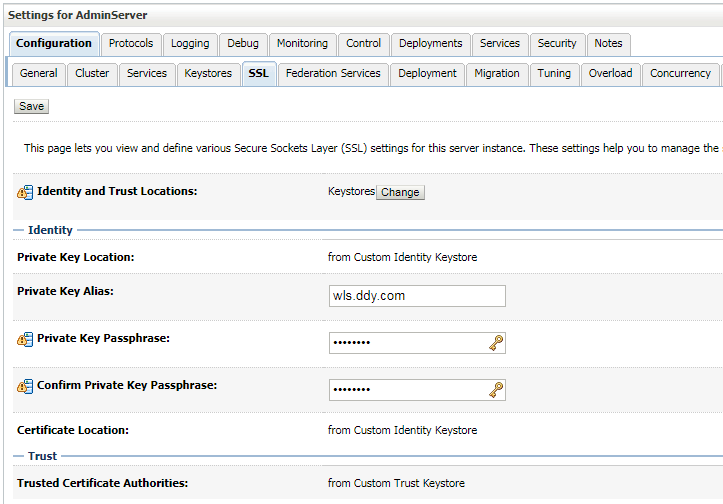
Click on « Configuration / SSL » tab
-
Apply the following modifications :
o
Identity
and Trust Location : Keystores (default)
o
Private
Key Location : from Custom Identity Keystore (default).
o
Private
Key Alias : « alias used for the key ». (use the value when adding certificate to keystore).
o
Private
Key Passphrase : « password used when creating the key alias ».
o
Confirm
Private Key Passphrase : « password used when creating the key alias »
-
Click on “Save”.
Note : Passphrase cannot be empty, if not added during creation, use keytool to add a passphrase.
- Click on « Activate changes ».
It can be usefull to disable hostname verification (only for testing purpose, not recommanded for production).
Weblogic doesn't allow certificate not matching hostname by default.
To disable hostname verification.
-
Go to “ Environment / Servers / <ServerName> »
-
Click on « Configuration / SSL» tab
-
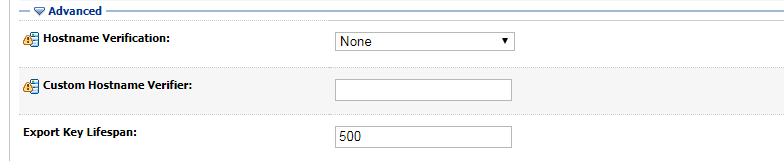
Click on “Advanced” section and make the following changes :
o
Hostname
Verification : « NONE »
o
Custom
Hostname Verifier : Leave empty
-
Click on “Save”
-
Click on « Activate Changes. »
Note : To use certifcates using Wildcards, you can use a Custom Verifier :
Example : *.ddy.com
-
Go to “ Environment / Servers /
<ServerName> »
-
Click on « Configuration / SSL » tab
-
Click on “Advanced” section and set the following values :
o
Hostname Verification : Custom Hostname Verifier
o
Custom Hostname Verifier :
weblogic.security.utils.SSLWLSWildcardHostnameVerifier
-
Click on “Save”
-
Click on « Activate Changes. »